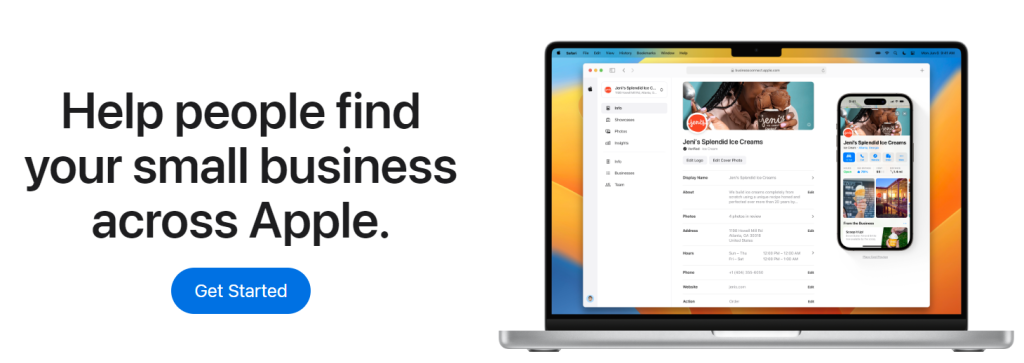
With over 1 billion active Apple devices, listing your business on Apple Maps can be a great way to increase your online visibility and drive traffic to your business. Businesses with physical locations like stores, service centres, movie theatres, malls, etc are the popular walk-in places. Maps guide users to reach the physical location with ease. In this blog post, we’ll give you a complete guide to using Apple Maps Connect to list your business and boost traffic and tips to optimize your presence.
What is Apple Maps Connect?
Apple Maps Connect is a free tool that allows business owners to easily manage their business information on Apple Maps. It allows businesses to add or update their basic information, photos, and videos, monitor customer reviews, add working hours, website details, phone numbers, and amenities available, change apple maps business address, and many more. It also provides business owners with valuable customer insights that can be used to improve the business’s online presence and store service and drive more traffic to their stores.
How to Add Business to Apple Maps?
Adding your business to Apple Maps is a simple and straightforward process. It can be done through Apple Maps Connect. Here is a step-by-step guide to adding business to Apple Maps.
Step 1: Sign up for Apple Maps Connect

To get started, go to the Apple Maps Connect website and sign in with your Apple ID. If you don’t have one, you can create Apple ID for business for free. Once you’ve signed in, you’ll be asked to provide some basic information about your business, including the name, address, and phone number.
Step 2: Add additional business information
Once you’ve verified your business information, you can add additional information to your business listing. This includes your website, email address, business hours, social media accounts, and more. Make sure to fill out as much information as possible to make it easier for customers to find and connect with your business.
Step 3: Verify your business information
After you’ve provided your basic information, you’ll need to verify your business. In order to complete the verification of business, you need to provide an identifiable business document such as business registration, utility bills, or lease/rental agreement. It might take up to a week to verify the business by Apple and appear on the maps.
Step 4: Manage your business information
Apple Maps Connect allows you to easily manage your business information, including updating your hours of operation, reservation and appointment options, parking facility, adding photos, and responding to customer reviews. You can also use the tool to create and manage special offers and events, which can help attract new customers to your business.
Step 5: Monitor your business performance
Apple Maps Connect provides insights into how customers are interacting with your business on Apple Maps. You can see how many people are viewing your business listing, how many are clicking through to your website, and more analytics data. This information can help you make informed decisions about how to optimize your business listing to attract more customers.
It is important to keep your business information up-to-date on Apple Maps. Listing owners can make changes anytime by logging into Apple Maps Connect and editing the listing. Managing the Apple business profile is a good idea to monitor customer reviews and respond to concerns and feedback. This will help you build a positive reputation on Apple Maps and attracts more customers to your business.
Tips for optimizing your business listing on Apple Maps
Now that you know how to use Apple Maps Connect to list your business, here are some tips for optimizing your business listing to attract more customers:
- Use high-quality photos: Make sure to use high-quality photos of your business and products to make your listing stand out.
- Use relevant keywords: Use relevant keywords in your business description to help customers find your business when searching on Apple Maps.
- Keep your information up-to-date: Make sure to keep your business information up-to-date, including your hours of operation, phone number, and address.
- Respond to customer reviews: Responding to customer reviews shows that you value customer feedback and can help improve your business’s reputation on Apple Maps.
- Offer special promotions: Use the special offers feature in Apple Maps Connect to offer promotions and discounts to customers, which can help attract new business.
Will Listing Business on Apple Maps Help in Business Growth?
Apple Maps Connect is a powerful tool for business owners looking to boost their online visibility and drive traffic to their businesses. Following the steps outlined in this guide and optimizing your business listing on Apple Maps, you can attract more customers and grow your business. So what are you waiting for? Sign up for Apple Maps Connect today and start listing your business on one of the most popular mapping apps in the world!
FAQs
- How long does it take for the business to appear on Apple Maps?
Once a listing is submitted on Apple Maps Connect, it can take up to one week for the business to appear on Apple Maps.
- What are the charges to list a business on Apple Maps?
Adding Business on Apple Maps Connect is free of cost. However, if you opt to list through a third party, they may charge some service fee.


Leave a Reply